Supported Hardware
Below is a list of supported hardware. If you’re just starting out and planning to buy something for this project, I recommend choosing boards that support 5GHz Wi-Fi, as support for the 2.4GHz standard in Google services is gradually phasing out.
I’m starting the list with boards featuring the AIC8800 chipset. They support 5GHz Wi-Fi and, in my opinion, handle Bluetooth and Wi-Fi coexistence really well (I personally use a Bluetooth OBD dongle for EV features and Wi-Fi at the same time). Of course, your choice will depend on your preferences, availability in your country, and price (sometimes shipping costs are higher than the board itself, which obviously defeats the purpose).
From our Discord community, it turns out the most popular board among users is the Pi Zero 2 W. I’ve used it for years in this project, but having a direct comparison with other boards, you can often get a MilkV or Radxa board for the same price, which are much better suited for our use case.
Please also keep in mind that the order of the list is just my subjective take on what works best for this project. I don’t want this to be misunderstood as some ultimate truth carved in stone. For example, the Pi Zero 2 W being close to the bottom doesn’t mean it’s a bad board. There are scenarios where it works great – in my car it ran fine for a long time without any stuttering, until I started relying more heavily on Bluetooth alongside Wi-Fi. There are configurations where a Raspberry Pi is perfectly good enough, and its low power consumption is definitely a plus.
A clear advantage of Raspberry Pi boards is their huge popularity, which also means great availability. However, the Broadcom radio chipset they all use leaves a lot to be desired, in my opinion.
The thing with the Pi Zero 2 W (and Broadcom’s radio chipset in general) is that when you try to connect to a Bluetooth device – especially one that’s out of range – the Wi-Fi link tends to suffer. You start losing pings, and the Android Auto connection can drop entirely. That’s the main reason why, for this specific use case, other boards tend to perform better.
Notes on Specifications, Measurements, and Links
The specifications listed below are taken from various sources – mainly official vendor websites, but also my own experience and information gathered from Wikipedia. If you spot any mistake, feel free to let me know!
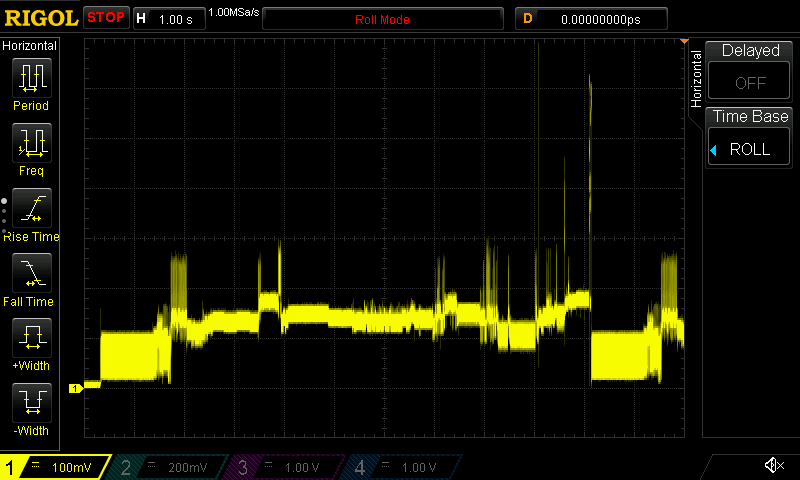
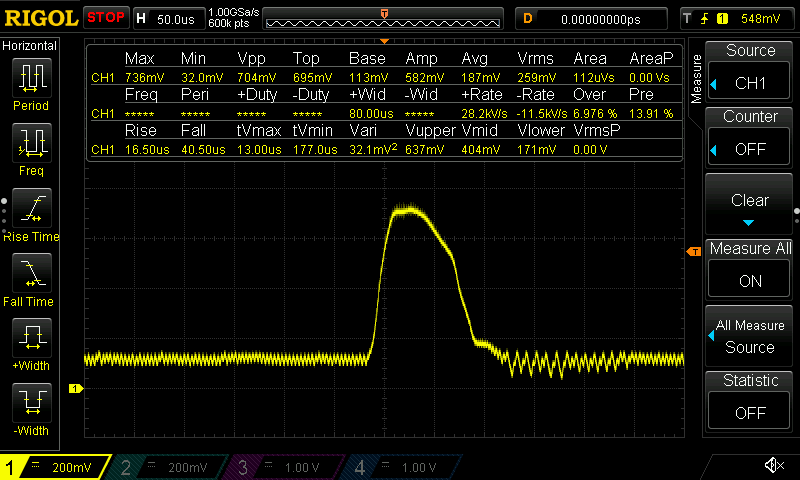
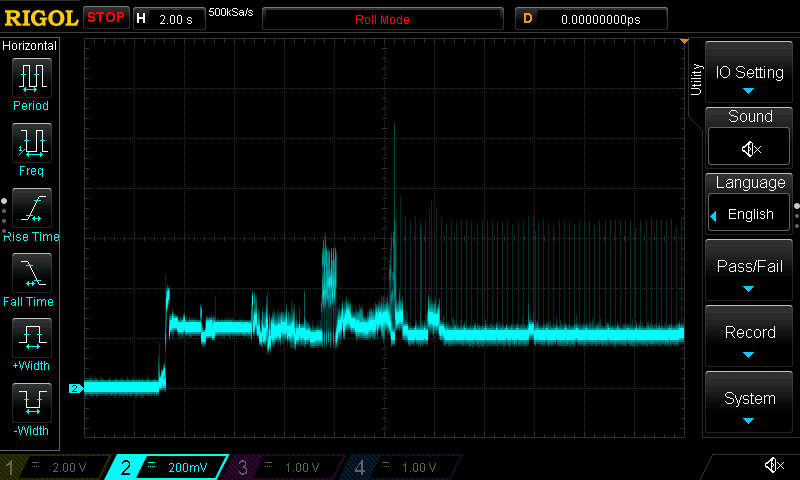
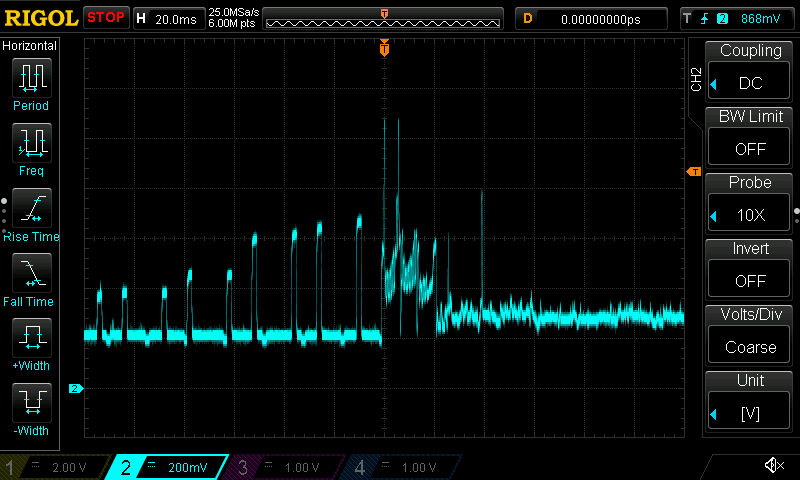
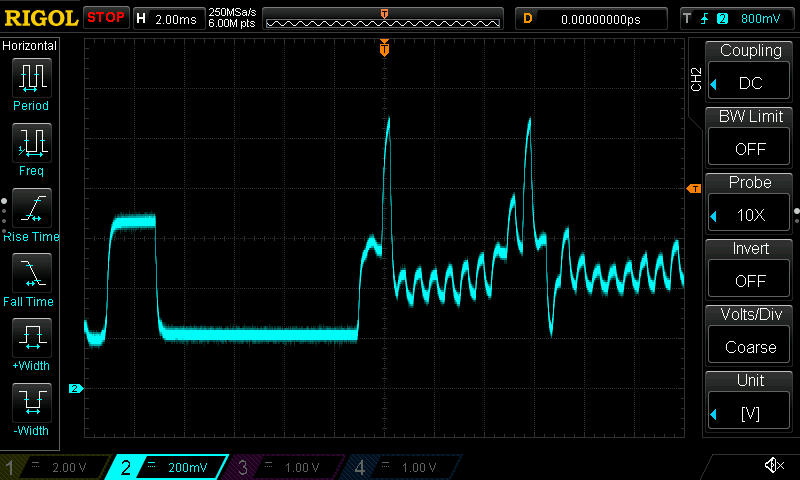
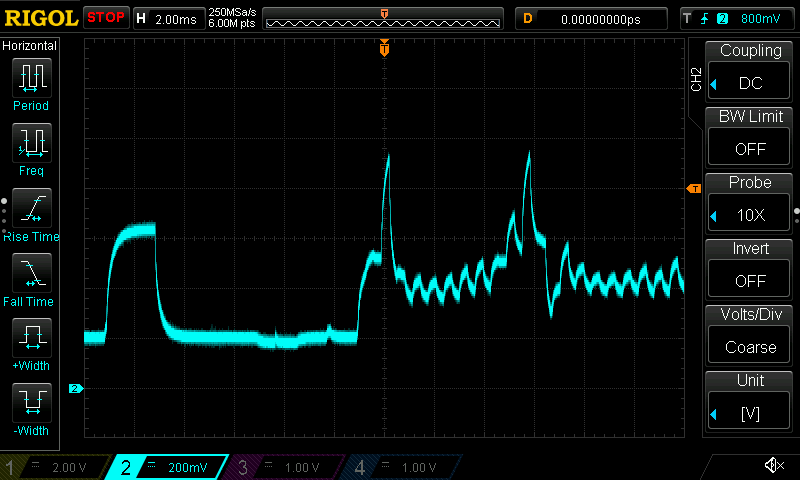
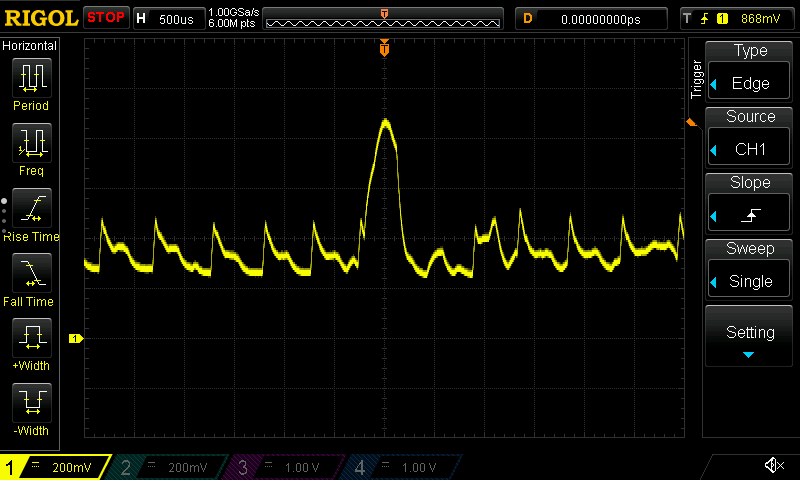
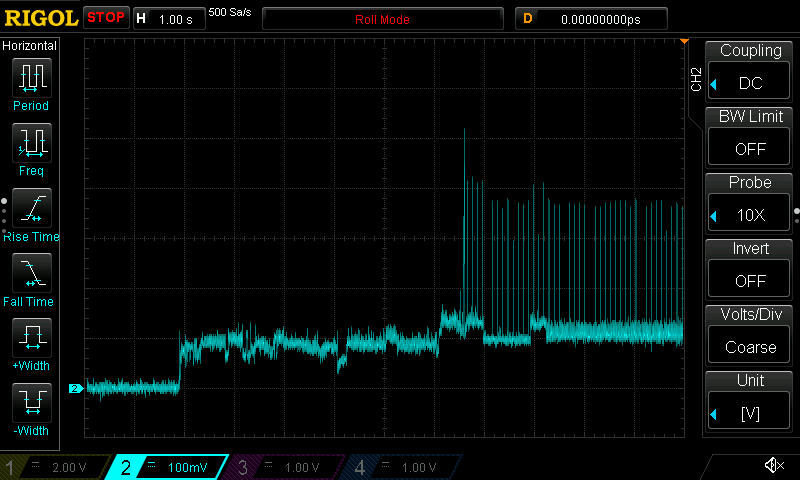
Power measurements: for some boards I managed to measure power consumption using an oscilloscope and a 1-ohm shunt resistor. Whenever I have such data available, I include the corresponding waveforms.
WARNING
AliExpress links: I’m simply sharing the links I personally used to buy SBCs. I’m not responsible for them, nor am I affiliated with any seller. You buy at your own risk.
MilkV DuoS
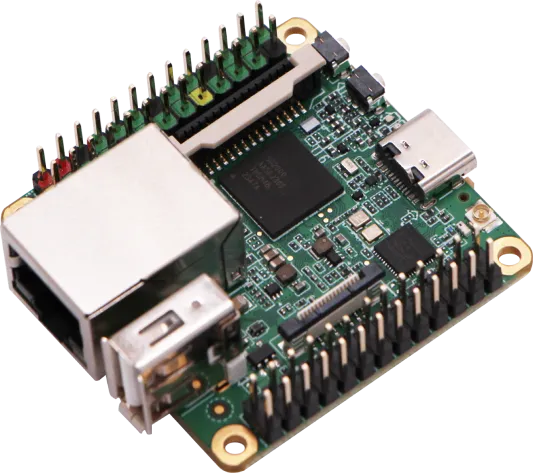
| Feature | Specification |
|---|---|
| URL | https://milkv.io/duo-s |
| SoC | SG2000 |
| RISC-V CPU | C906@1Ghz + C906@700MHz |
| Arm CPU | 1 x Cortex-A53@1GHz |
| MCU | 8051@6KB SRAM |
| Storage | 1 x microSD connector, optional onboard eMMC |
| RAM | SIP DRAM 512MB |
| USB | 1 x Type-C for power and data or 1x USB 2.0 A Port HOST |
| Wireless | Optional WIFI6 / BT5.4 onboard |
| Ethernet | 100Mbps ethernet port(RJ45) onboard |
| Power | 5V/1A |
| Dimentions | 43mm x 43mm |
| Others | 1x BOOT swich, 1x Recovery Key, 1x RST Key |
| AliExpress | https://www.aliexpress.com/item/1005006719645936.html |
INFO
The aa-proxy image is prepared to run on the RISC-V core, not on the ARM Cortex one (which is probably good news, since it means it draws less current).
Even though the board supports eMMC, at the moment only SD card booting is supported. eMMC support is planned for the future.
Current draw waveforms
Radxa ZERO 3W
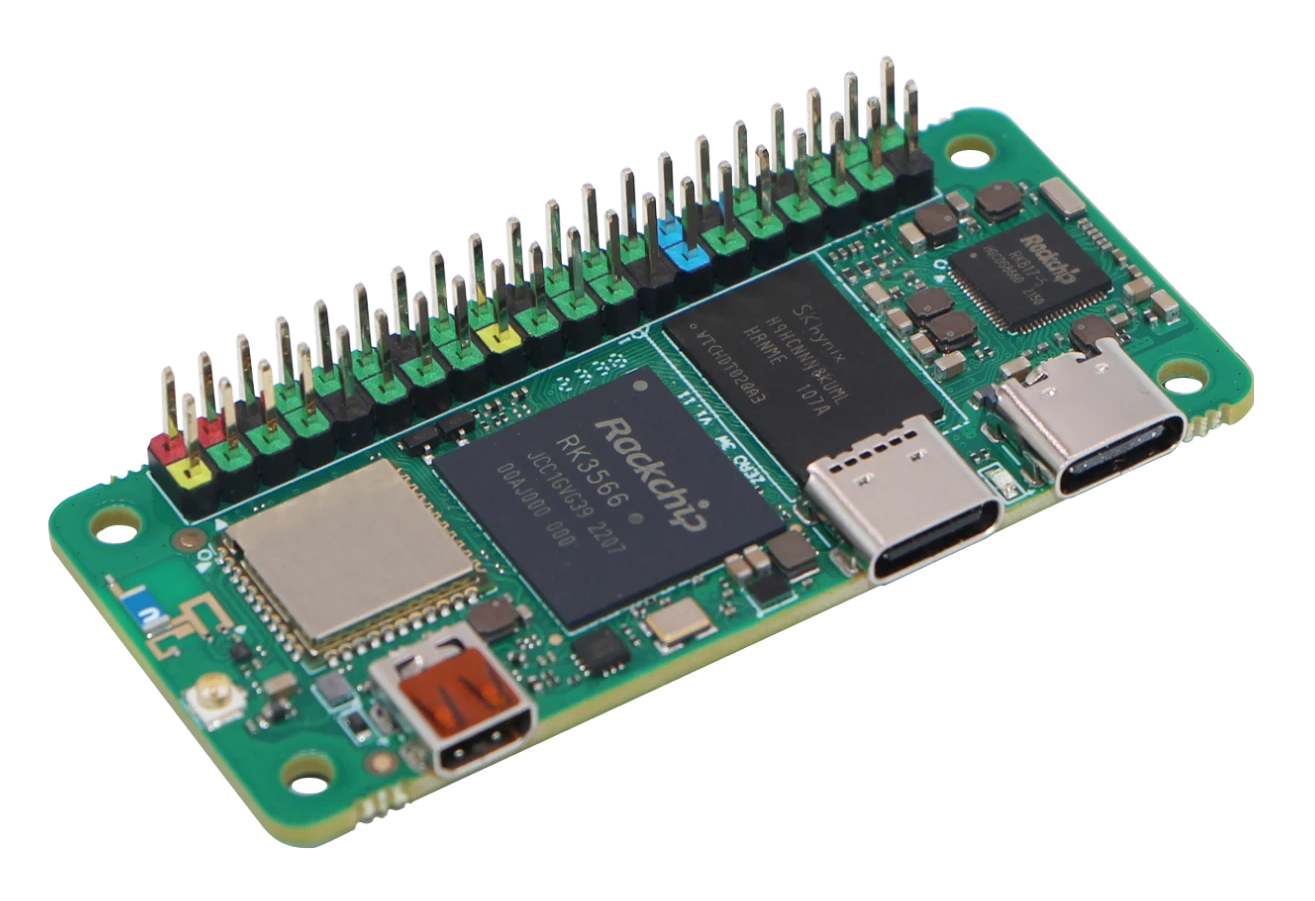
| Feature | Specification |
|---|---|
| URL | https://radxa.com/products/zeros/zero3w/ |
| SoC | Rockchip RK3566 |
| CPU | Quad‑core Arm® Cortex®‑A55 (Armv8) 64‑bit @ 1.6GHz |
| Storage | Option Onboard eMMC: 8GB / 16GB / 32GB / 64GB 1 x Micro SD Card Slot |
| RAM | 1GB / 2GB / 4GB / 8GB LPDDR4 |
| USB | 1x USB 2.0 OTG Type C Port 1x USB 3.0 Host Type C Port |
| Wireless | IEEE 802.11b/g/n/ac/ax(WiFi6) and BT 5.4 with BLE Enable External or Onboard Antenna via Software Control |
| Operating Conditions | Recommended environmental temperature: 0 ~ 50°C Radxa ZERO 3W has a temperature limit of 80°C, beyond which it throttles clock speeds for reliability For continuous high-performance use, external cooling methods like heat sinks or fans can maintain maximum clock speed below the 80°C limit |
| Power | Requires 5V/2A power adapter |
| Dimentions | 65 mm × 30 mm |
| AliExpress | https://www.aliexpress.com/item/1005007614734251.html |
Current draw waveforms
AAWireless 1
| Feature | Specification |
|---|---|
| SoC | Rockchip RV1109 (Radxa CS317) |
| Storage | eMMC |
DANGER
Flashing aa-proxy will void your warranty, and at this moment there's no way to restore the original firmware.
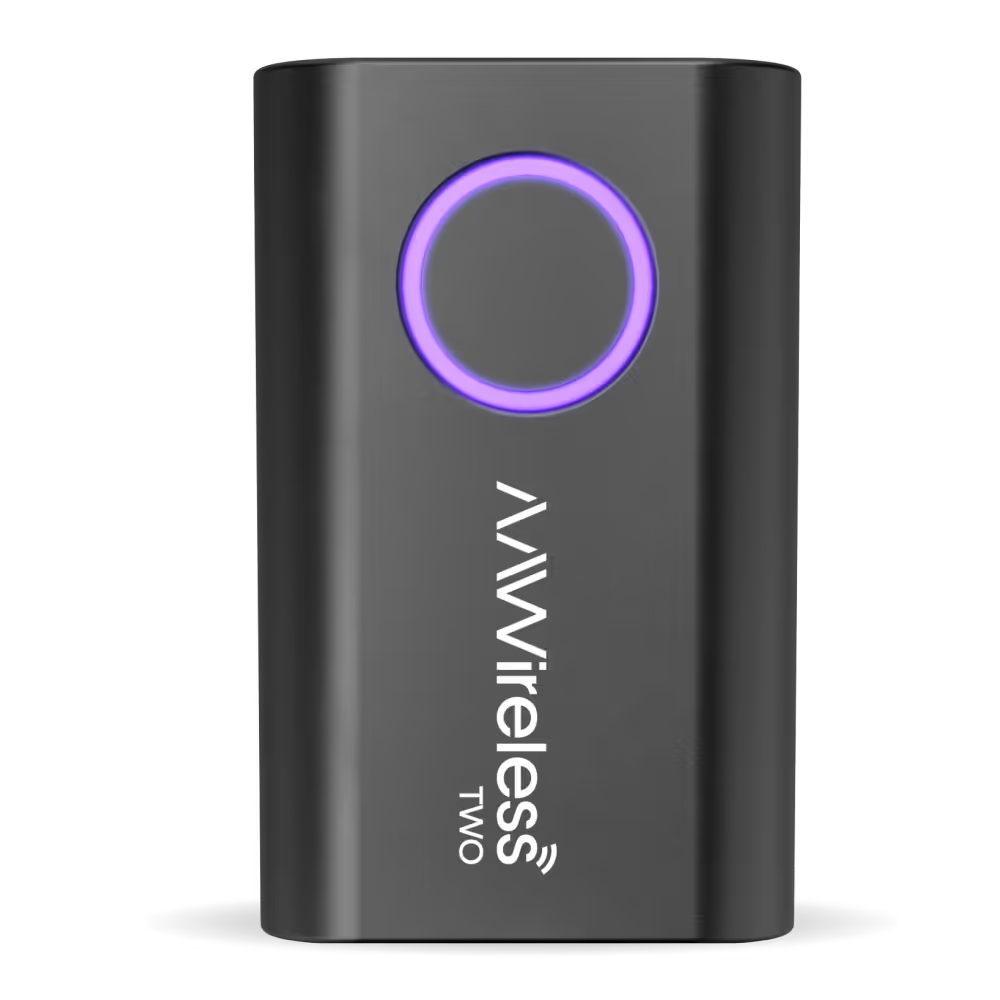
AAWireless TWO
| Feature | Specification |
|---|---|
| URL | https://www.aawireless.io/en/products/aawireless-two |
| SoC | Rockchip RV1103 |
| CPU | 1× ARM Cortex-A7 32-bit |
| Storage | SPI Flash 256MB |
| Wi-Fi | 802.11a/b/g/n (Realtek RTL8733BS) |
| Bluetooth | Bluetooth v2.1+EDR/v5.2 |
| USB | 1× USB-C |
DANGER
Flashing aa-proxy will void your warranty, and at this moment there's no way to restore the original firmware.
INFO
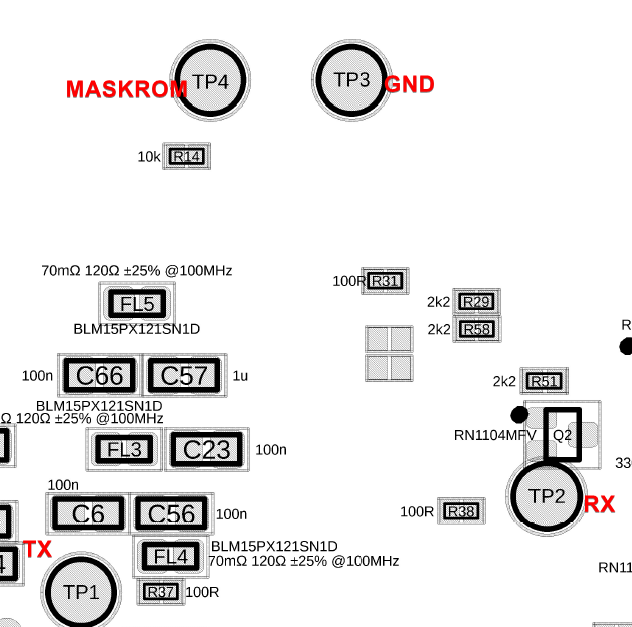
New devices shipped from the factory no longer require opening the case or shorting the MASKROM and GND pins to enter MaskROM mode.
Instead, you can use the button on the device:
Hold the button → plug in the USB cable → keep holding the button for 2 seconds → the device enters MaskRom mode.
Once the device enters MaskRom mode (which you can confirm by the different USB device identity), you can use the flashing script provided here to upload the new firmware:
https://github.com/aa-proxy/buildroot/tree/main/tools/aaw
For older devices, or if the button method does not work, you can still open the case and manually short the MASKROM and GND pins during startup to force the device into MaskRom mode:
click for detailed PCB view
Current draw waveforms
AAWireless Firmware Flashing Instructions
AAW boards have no removable media, so they flash over USB. Put the board into maskrom mode first:
- AAW1 — hold the pinhole button, then plug in USB,
Details
For very old CS307's you have to hold the pinhole button > 10 seconds, let go, and it will reboot into maskrom
For the later ones, it's the same hold button and plug in process as CS317
- AAW2 (newer batch) — hold the button, plug in USB, and keep holding for 2 seconds,
- AAW3 — hold the button, plug in USB, and keep holding for 2 seconds,
Then flash using this repo:
https://github.com/aa-proxy/buildroot/tree/main/tools/aaw
./tools/aaw/flash.sh aaw1-cs317 buildroot/output/aaw1-cs317/images/sdcard.img
./tools/aaw/flash.sh aaw2b buildroot/output/aaw2b/images
./tools/aaw/flash.sh aaw3 buildroot/output/aaw3/images
aaw1-cs317 takes the sdcard.img file, aaw2b and aaw3 take the images directory.
Raspberry Pi 4
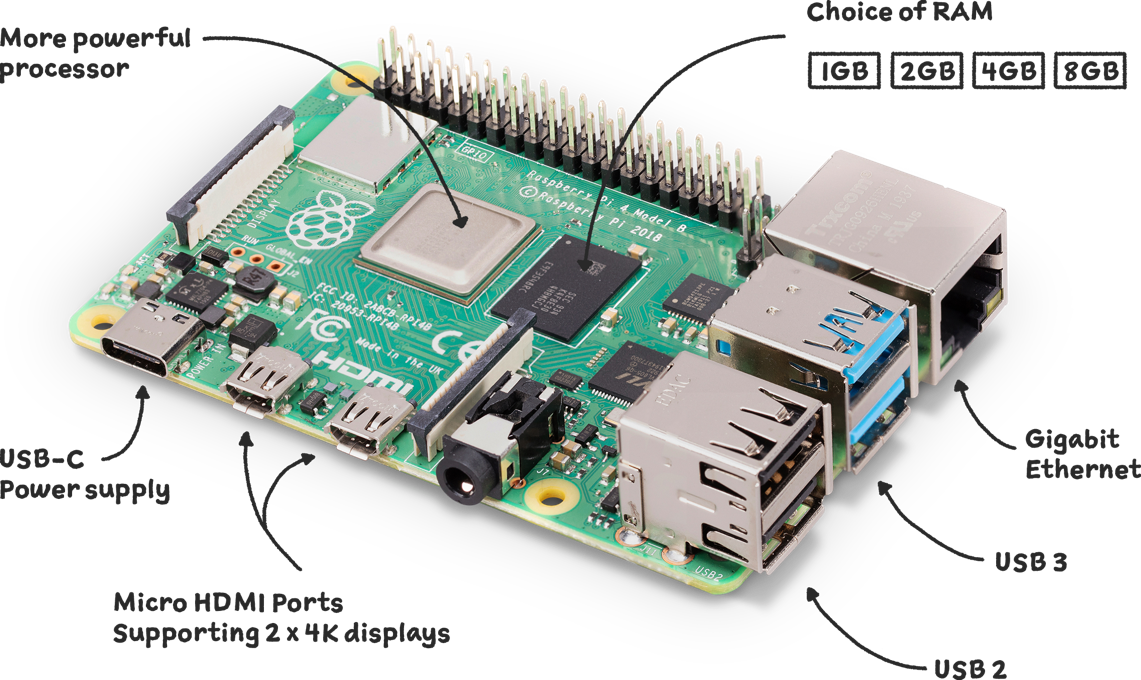
| Feature | Specification |
|---|---|
| URL | https://www.raspberrypi.com/products/raspberry-pi-4-model-b/ |
| SoC | BCM2711 |
| CPU | 4× Cortex-A72 @ 1.5 GHz or 1.8 GHz |
| RAM | 1, 2, 4 or 8 GB |
| Storage | MicroSDHC slot |
| Wi-Fi | 2.4/5 GHz 802.11b/g/n/ac |
| Bluetooth | Bluetooth 5.0/BLE |
| Ethernet | 1× Gigabit |
| USB | 2× USB 3.0, 2× USB 2.0, 1 (Power USB-C) |
| Power | 3A (15 W) power supply recommended |
| Dimentions | 85.60 × 56.5 × 17 mm |
Raspberry Pi 5
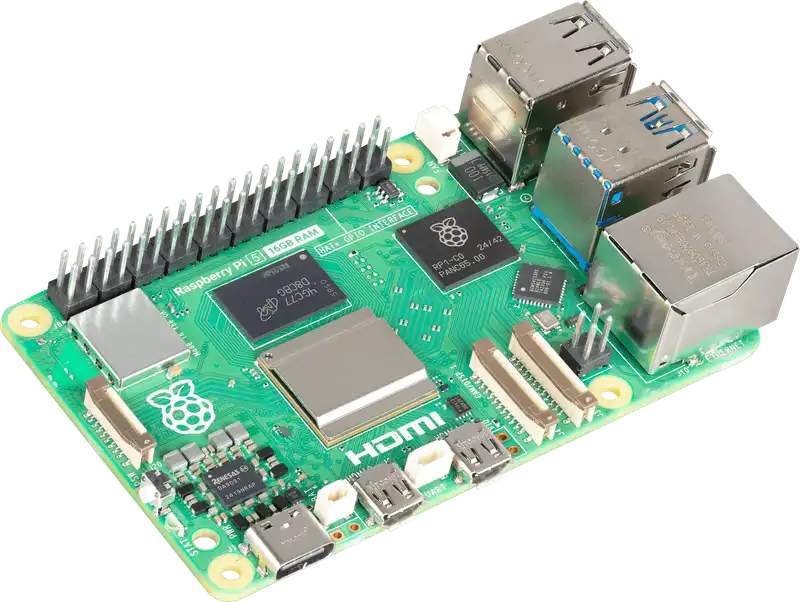
| Feature | Specification |
|---|---|
| URL | https://www.raspberrypi.com/products/raspberry-pi-5/ |
| SoC | BCM2712 |
| CPU | 4× Cortex-A76 @ 2.4 GHz |
| RAM | 2, 4, 8 or 16 GiB |
| Storage | MicroSDHC UHS-1 Slot |
| Wi-Fi | 2.4/5 GHz 802.11b/g/n/ac |
| Bluetooth | Bluetooth 5.0/BLE |
| Ethernet | 1× Gigabit |
| USB | 2× USB 3.0, 2× USB 2.0 |
| Power | 12 W |
| Dimentions | 85 × 56 mm |
Possible OTG problems
I have a reports that sometimes OTG on the Pi5 is not working. In this case the logs (dmesg) are saying:
dwc2 1000480000.usb: dwc2_core_reset: HANG! Soft Reset timeout GRSTCTL_CSFTRST
dwc2 1000480000.usb: probe with driver dwc2 failed with error -16
And aa-proxy is not working (HU connection problems). To solve this problem you need to manually flash official RaspberryPi OS image and perform a manual firmware update.
Here are required steps:
Step 1: Prepare the System:
Open a terminal window (Ctrl+Alt+T).
Update the system with the following commands: sudo apt update, sudo apt full-upgrade.
Reboot Raspberry Pi to apply all updates: sudo reboot.
Step 2: Update the Firmware:
Open a terminal window if it's not already open.
Access the configuration tool: sudo raspi-config.
Navigate to: Advanced Options > Bootloader Version.
Select Latest to update the firmware to the newest version available.
Exit the configuration tool and reboot Raspberry Pi to apply the changes: sudo reboot.
After this in aa-proxy the OTG should work:
[    0.089468] dwc_otg: version 3.00a 10-AUG-2012 (platform bus)
[    0.089487] dwc_otg: FIQ enabled
[    0.089488] dwc_otg: NAK holdoff enabled
[    0.089489] dwc_otg: FIQ split-transaction FSM enabled
[    0.089492] Module dwc_common_port init
[    1.513765] dwc2 1000480000.usb: supply vusb_d not found, using dummy regulator
[    1.513800] dwc2 1000480000.usb: supply vusb_a not found, using dummy regulator
[    1.614057] dwc2 1000480000.usb: EPs: 8, dedicated fifos, 4080 entries in SPRAM
info by: @pepelxl
Raspberry Pi 3 A+
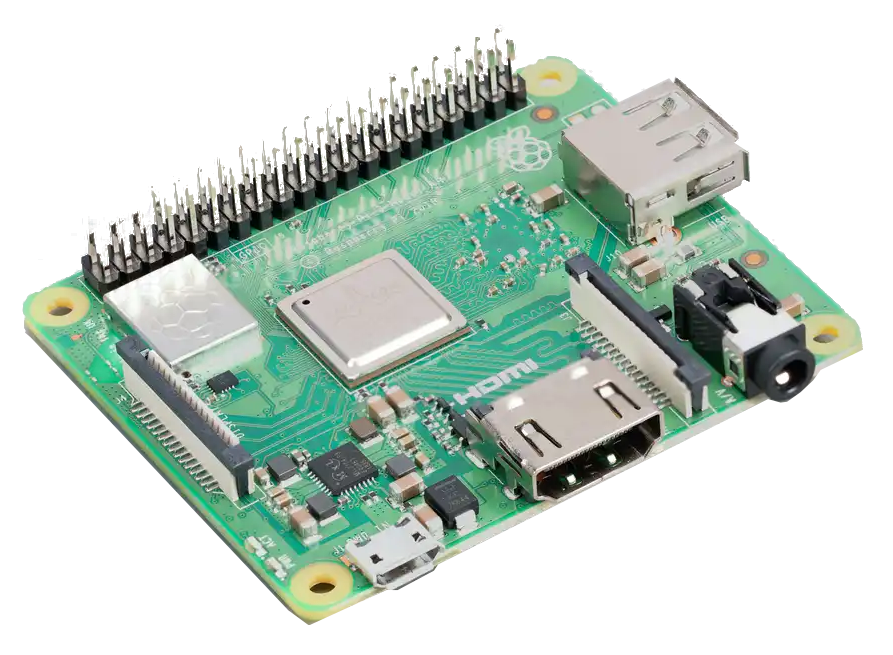
| Feature | Specification |
|---|---|
| URL | https://www.raspberrypi.com/products/raspberry-pi-3-model-a-plus/ |
| SoC | BCM2837 |
| CPU | 4× Cortex-A53 @ 1.4 GHz |
| RAM | 512 MiB |
| Storage | MicroSDHC slot |
| Wi-Fi | 2.4/5 GHz 802.11b/g/n/ac |
| Bluetooth | Bluetooth 4.2/BLE |
| USB | 1× USB 2.0 |
| Dimentions | 65 × 56.5 mm |
Raspberry Pi Zero 2 W
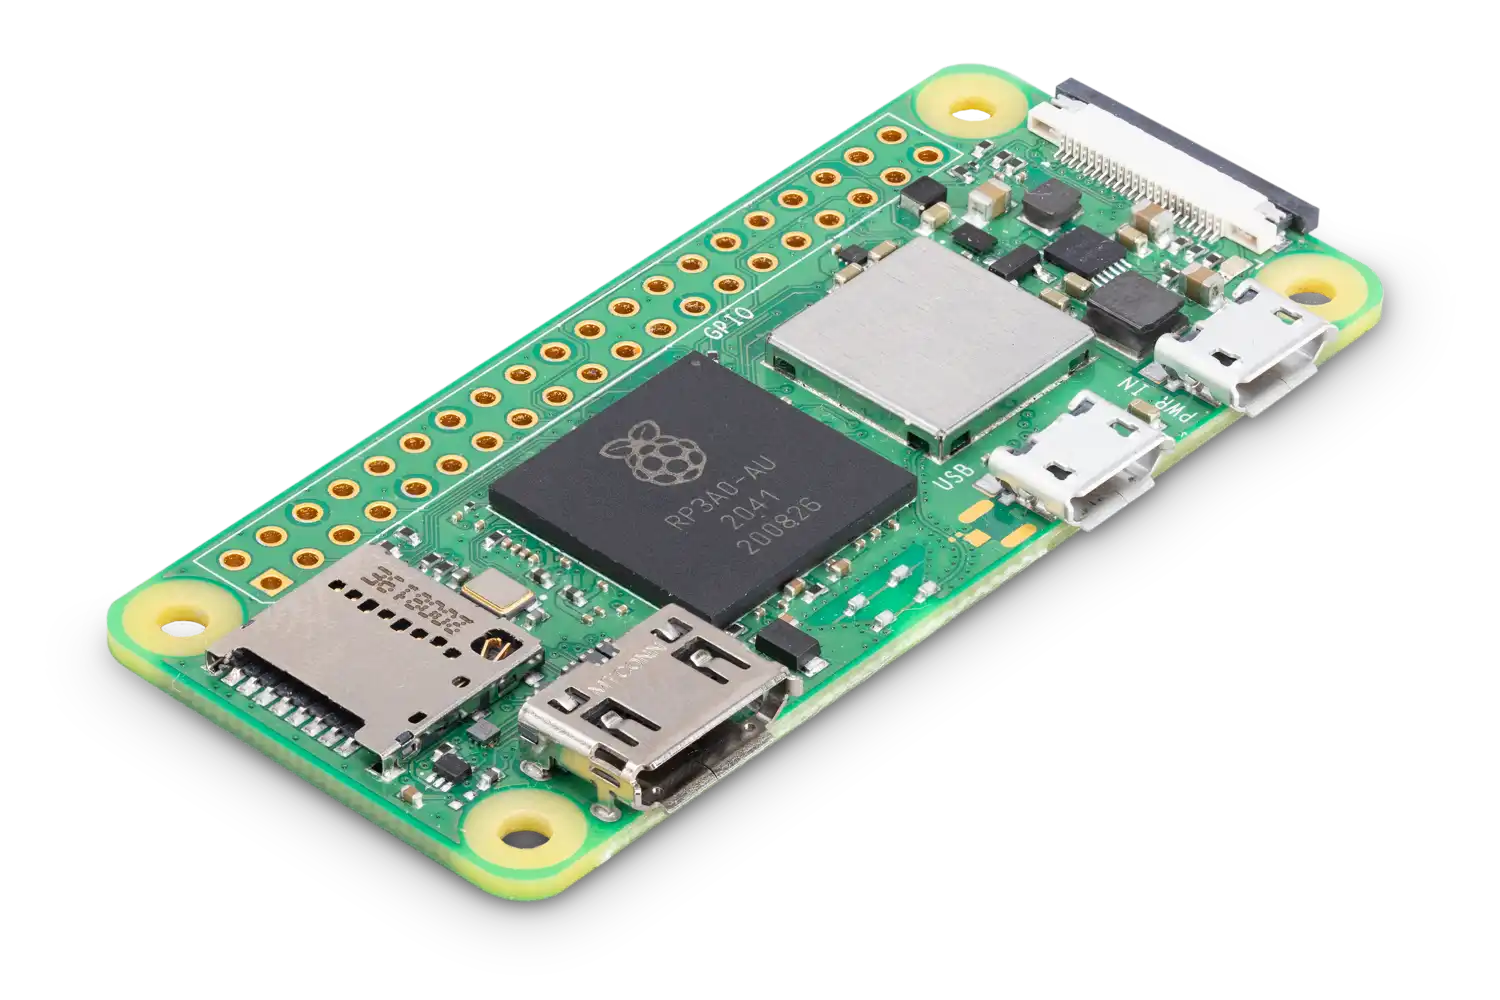
| Feature | Specification |
|---|---|
| URL | https://www.raspberrypi.com/products/raspberry-pi-zero-2-w/ |
| SoC | BCM2710 |
| CPU | 4× Cortex-A53 @ 1 GHz |
| RAM | 512 MiB |
| Storage | MicroSDHC slot |
| Wi-Fi | 2.4 GHz 802.11b/g/n |
| Bluetooth | Bluetooth 4.2/BLE |
| USB | 1 Micro-USB 2.0 OTG, 1 Micro-USB for power |
| Power | 120 mA (0.6 W) average when idle |
| Dimentions | 65 × 30 × 5 mm |
Raspberry Pi Zero W
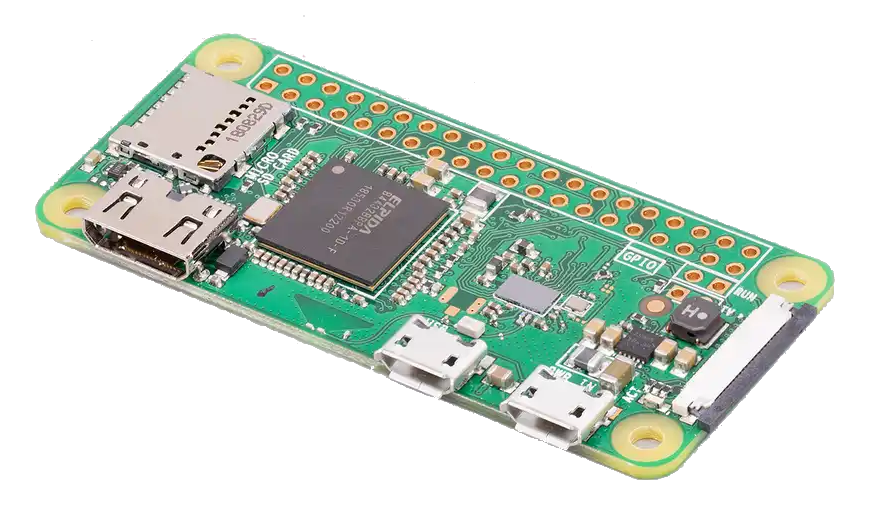
| Feature | Specification |
|---|---|
| URL | https://www.raspberrypi.com/products/raspberry-pi-zero-w/ |
| SoC | BCM2835 |
| CPU | 1× ARM11 @ 1 GHz |
| RAM | 512 MiB |
| Storage | MicroSDHC slot |
| Wi-Fi | 2.4 GHz 802.11b/g/n |
| Bluetooth | Bluetooth 4.2/BLE |
| USB | 1 Micro-USB 2.0 OTG, 1 Micro-USB for power |
| Power | 100 mA (0.5 W) average when idle, 350 mA (1.75 W) maximum under stress (monitor, keyboard and mouse connected) |
| Dimentions | 65 × 30 × 5 mm |